


Courses by Software
Courses by Semester
Courses by Domain
Tool-focused Courses
Machine learning
POPULAR COURSES
Success Stories

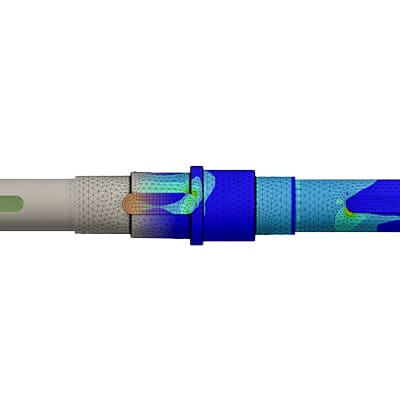
Week 11 - Final project
DEVELOPMENT OF A DOOR TRIM PANEL Q -Creation of CAD model considering following inputs as like in OEM and tier1 companies a) Class A surface b) Nominal thickness : Refer master sections c) Attachment strategy Find a attachment strategy for the door panel complete work. Use Push pin with Dog house for Lower…
Ahamed Sukriya
updated on 09 Dec 2022


DEVELOPMENT OF A DOOR TRIM PANEL
Q -Creation of CAD model considering following inputs as like in OEM and tier1 companies
- a) Class A surface
- b) Nominal thickness : Refer master sections
- c) Attachment strategy
Find a attachment strategy for the door panel complete work.
Use Push pin with Dog house for Lower substrate – Door panel attachment
Use heat stakes for part to part attachment
Output required:
- Create thickened part using master section for reference
- Create the mounting features as per design guidelines in the industry and with master sections
- Apply material details
- Draft analysis & Tooling analysis
- Creation of parting lines and check tooling feasibility
Introduction -
A car door is a type of door opening, typically hinged on its front edge, but sometimes attached by other mechanisms such as tracks, for entering and exiting a vehicle. Doors most often integrate side windows for visibility from inside the car and can be locked to secure the vehicle.Car door trim lower is defined as the direction in which the mould/core and cavity open. Selection of the direction of the tooling axis depends on the ease at which components can be easily ejected.

Aim -
To create a door interior part from the inputs of class A surface along with master section by following the design rules followed in catia v5.
Objective-
- Create thickened part using master section for reference
- Create the mounting features as per design guidelines in the industry and with master sections
- Apply material details
- Draft analysis & Tooling analysis
- Creation of parting lines and check tooling feasibility
Input of class A surface -

_1670533401.png)
Major steps required -
STEP 1- OPENING THE GIVEN CLASS A SURFACE
Here we open the given class a surface and start the procedure in catia.In automotive design application Class A surfaces are created on all visible exterior surfaces (ex; body panels, bumper, grill, lights etc.) and all visible surfaces of see-touch & feel parts in interior (ex: Dashboard, seats, door pads etc.).
Given master section-
_1670533455.png)
_1670533438.png)
CLASS A SURFACE ARM REST
_1670531368.png)
CLASS A SURFACE LOWER SUBSTRATE
_1670531400.png)
CLASS A SURFACE MAP POCKET
_1670531540.png)
CLASS A SURFACE TOP SUBSTRATE
_1670531490.png)
STEP 2-CREATING THE TOOLING AXIS
Extracting a surface from the A surface and creating a point we make the a line by taking the intersection and bisecting it from the sketch the tooling axis is made. It is defined as the direction in which the mould/core and cavity open. Selection of the direction of the tooling axis depends on the ease at which components can be easily ejected.
Extracting a surface from the A surface and creating a point we make the a line by taking the intersection and bisecting it from the sketch the tooling axis is made.
TOOLING AXIS OF ARM REST
_1670531984.png)
TOOLING AXIS OF LOWER SUBSTRATE
_1670532006.png)
TOOLING AXIS OF MAP POCKET
_1670532022.png)
TOOLING AXIS OF TOP SUBSTRATE
_1670532043.png)
STEP 3-DRAFT ANALYSIS
The draft is the amount of taper for moulded or cast parts perpendicular to the parting. line. Draft angles are a design consideration that makes it much easier for a part to release cleanly from a mould.
A draft angle is calculated as a degree measurement (or, less often, an inch or millimetre measurement) from the vertical axis of a mould, and it helps account for thermoplastic shrinkage, a practical reality of the injection moulding process for most materials.Most of the industries is using minimum draft angle is 3 degree.
DRAFT ANALYSIS OF ARM REST
_1670532089.png)
_1670532138.png)
tooling axis Y direction side core axis
_1670532225.png)
_1670532247.png)
tooling axis Y direction side core axis
DRAFT ANALYSIS OF LOWER SUBSTRATE
_1670532322.png)
A SURFACE DRAFT
_1670532460.png)
B SIDE FEATURE DRAFT
DRAFT ANALYSIS OF MAP POCKET
_1670532602.png)
A SURFACE DRAFT
_1670532564.png)
B SIDE FEATURE DRAFT
DRAFT ANALYSIS OF TOP SUBSTRATE
_1670532665.png)
A SURFACE DRAFT
_1670532722.png)
B SIDE FEATURE DRAFT
STEP 4- CREATION OF CLASS B SURFACE
The Class B finish is a quality finish with only minimal imperfections. A Class B finish is the most common finish for exterior surfaces. It is normally specified on surfaces such as external covers, panels, and parts that are fairly prominent.Insert a new gemeotrical set.
Measure the value of thickness in master section.The value is 2.5mm Offset the class A surface to 2.5mm.
CLASS B SURFACE ARM REST
_1670531663.png)
CLASS B SURFACE LOWER SUBSTRATE
_1670531712.png)
CLASS B SURFACE MAP POCKET
_1670531755.png)
CLASS B SURFACE TOP SUBSTRATE
_1670531812.png)
STEP 5- CREATION OF CLASS C SURFACE
The Class C finish allows more imperfections than Class A or B. Class C is often specified for interior surfaces not readily visible, surfaces that will be covered by another part when assembled, or surfaces which the Customer feels do not need to meet a high cosmetic finish.
in the class c we Sweep the boundaries for industrial standard 3 degree towards tooling axis and at the end we trim the extra sweep and join both a,b and c surfaces.once it is done we define the part body make sure the body made is closed and give thick feature.
CLASS C SURFACE ARM REST
_1670532793.png)
CLASS C SURFACE LOWER SUBSTRATE
_1670532845.png)
CLASS C SURFACE MAP POCKET
_1670532886.png)
CLASS C SURFACE TOP SUBSTRATE
_1670532925.png)
STEP 6- CREATION OF B SIDE ATTACHMENT FEATURES
The B-side of the mold will often have more complicated and protruding features. These features allow the plastic to cool onto that side and away from the A-side. At the same time, allowing the plastic to stick and shrink too hard will make the part eject forcefully or get stuck in the mold.
here we use the features are used for the attachment assembly and the strength of the material.the major B side features used are -
DOG HOUSE
Dog house is an engineering feature used in plastic trim design. Dog houses are used as supporting feature. Sometimes other engineering features like snaps; locators etc. are mounded on them to increase their strength.
_1670530428.png)
PUSHPIN
a short pin having a spool-shaped head of plastic, glass, or metal, used for affixing material to a bulletin board, wall, or the like.
_1670530444.png)
HEAT STAKES
Heatstakes is known as thermoplastic staking is the process of joining two dissimilar metals together
_1670530465.png)
LOCATOR
A round locating pin located concentrically in a hole is a common application of a 4-way pin, and helps to further secure the piece.
_1670530491.png)
FLANGE
A flange is a projecting ridge, rim, collar or ring on an object such as a column, beam, pipe and so on that provides additional strength or stiffness or additional surface area for the attachment of, or to, another object.
_1670530508.png)
B SIDE FEATURE VIEWS
_1670530526.png)
_1670530546.png)
_1670530570.png)
_1670530602.png)
_1670530628.png)
_1670597235.png)
WEIGHT OF THE COMPONENT
Here we apply material plastic to the producta and use measure command to calculate the weight of product.
WEIGHT OF THE TOP SUBSTRATE
_1670530708.png)
WEIGHT OF THE MAP POCKET
_1670530743.png)
WEIGHT OF THE LOWER SUBSTRATE
_1670530769.png)
WEIGHT OF THE ARM REST
_1670530797.png)
CALCULATION
Lower substrate=0.502kg
Map pocket=0.277kg
Arm rest =0.154kg
Top substrate=0.175kg
The total weight of the product is =1.108kg
CREATION OF PARTING LINE
Parting line is used to the differentiate between core and cavity
PARTING LINE MAP POCKET
_1670530909.png)
PARTING LINE LOWER SUBSTRATE
_1670530937.png)
TREE STRUCTURE
_1670533317.png)
_1670533336.png)
_1670533350.png)
_1670533362.png)
CONCLUSION -
Development of door trim panel is succesfully completed as per the design requirements.
Leave a comment
Thanks for choosing to leave a comment. Please keep in mind that all the comments are moderated as per our comment policy, and your email will not be published for privacy reasons. Please leave a personal & meaningful conversation.
Other comments...
Be the first to add a comment
Read more Projects by Ahamed Sukriya (29)
Week 11 - Final project
DEVELOPMENT OF A DOOR TRIM PANEL Q -Creation of CAD model considering following inputs as like in OEM and tier1 companies a) Class A surface b) Nominal thickness : Refer master sections c) Attachment strategy Find a attachment strategy for the door panel complete work. Use Push pin with Dog house for Lower…

09 Dec 2022 02:47 PM IST
Project 1
ENGINE WIRING HARNESS USING CATIA V5 Statement of assignment: Route the Wiring harness on Given Engine and Prepare flatten view drawing in CATIA V5. Application of all Packaging rules, Industry best practices studied in this course shall be demonstrated in design. Apply Protection coverings as required. Available connector…
07 Dec 2022 09:12 PM IST
Project 2
AUTOMOTIVE WIRING HARNESS BACKDOOR Statement of assignment: Route the Wiring harness on Given car body and Prepare flatten view drawing in CATIA V5. Application of all Packaging rules, Industry best practices studied in this course shall be demonstrated in design. Apply Protection coverings as required. Available connector…
07 Dec 2022 10:25 AM IST
Wiring harness design in CATIA V5 - 3D modeling Week 5 & 6 Challenge
Wiring harness design in CATIA V5 Aim- Q1. Route the following harness layout in Electrical workbench. Make assumption for harness bundle diameters. Use the connectors provided. After completion of routing, Check the bundle Continuity. Add snap of result in submission Add annotation to all connectors. Make an assumptions…
24 Nov 2022 03:16 PM IST
Related Courses


Skill-Lync offers industry relevant advanced engineering courses for engineering students by partnering with industry experts.


Our Company

4th Floor, BLOCK-B, Velachery - Tambaram Main Rd, Ram Nagar South, Madipakkam, Chennai, Tamil Nadu 600042.

Top Individual Courses
Top PG Programs
Skill-Lync Plus
Trending Blogs
© 2025 Skill-Lync Inc. All Rights Reserved.