


Courses by Software
Courses by Semester
Courses by Domain
Tool-focused Courses
Machine learning
POPULAR COURSES
Success Stories


Engine
Aim:
To route the wiring harness on given Engine and flatten view drawing in CATIA V5.
Objective:
- The objective of the project is to route the wiring harness on given Engine and prepare flatten view drawing in CATIA V5.
- All types of packaging rules have to be considered while routing the harness.
- Also, Industry best practices should be demonstrated in design.
- All the necessary details like clearance, clipping/clamping selection, harness fixing requirements, harness continuity should be provided in order to design wiring harness.

Wiring Harness Routing OF Engine:
- engine is taken to route the wiring harness. The engine modeller will provide the dummy connectors at all the locations.
- First check for all the connector and sensor locations. The present engine has 8 connector location on each side and 2 sensors at each side.
- The clips, clamps and channels can be used to route the harness with optimal solution.
- Also there are 4 cam-shaft sensors, so there are total 20 sensors that we have to connected electrically.
- Generally, 4-pole connectors are used for fuel injectors of the engine.
- The engine will also have an interconnection connector which will connect the engine to other parts of the vehicle. We will be using a 12-pole electrical connector with a mounting clip feature as an interconnection connector.
- The plastic guiding channel used in this harness should bemade of a material that can withstand at least 150 degree Celcius.
- The bend ratio for the all bundle segmets should be 1.4
Assumption:
- Provide clips/clamps as per requirement.
- Make sure that there is no any fauling case while designing the wire harness. Additional clips/clamps may be used to avoid fauling case.
- Give additional slack if needed. 5-10% slack is sufficient.
- Avoid routing over bolt and bolted joints to avoid harness puncture.
- Avoid routing on sharp edges or else provide protection over the harness.
- Follow the clearance distance and keep away the harness from heat generation components.
- Protection should be provided as needed according to surrounding temperature.
- Avoid direct support for harness on fuel lines routed in the engine.
- Use plastic guiding channels if needed.
- Branch length should be greater than 50mm.
- Minimum distance between two branch points should be at least 50mm.
- Minimum distance between clip and branch point should be at least 25mm.
- Avoid too many sheet metal brackets on the engine. Try to use available threaded bosses on the engine or demand for it.
- The wiring harness should be easy to assemble and easy to access.
- While using dummy connectors, ensure that whatever positions you are defining that are practical. Bundle diameters and another placements can be defined properly for the wire harness routing.
- If the packaging area is too tight and there are many packaging constraints then we can think of creating harness channel which can be used to route and protect the wire harness effectively.
- Creating Connectivity Assembly

- A Context Assembly for Engine Harness has created which will work as the main assembly as shown in above figure.
- A Context Assembly will contain Engine Assembly data for Bugatti V16 Engine and Engine Harness Geometrical Bundle Assembly.
- If any sheet metal bracket will require then they are added in the context assembly.
define 4-pole connector electrically

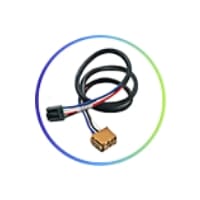
- Here, according to the requirement we are using 'C-1563689' which is a 4-pole connector. This CAD data is downloaded from te.com. Now, to define a connector electrically we should define the geometrical parameters like bundle connection point and connector connection point in Electrical Part Design workbench for the downloaded connector
connectors to the all 16 fuel injector sensors and 4 cam-shaft sensors
- In this step, we are placing connectors to fuel injector sensors and cam-shaft sensors. So we will require total 20 connectors which have to be added in the Engine Harness Geometrical Bundle Assembly. We have to use manipulation tools along with compass, snap and smart move features to locate all the 20 connectors at their desired locations.

MAGES OF THE ELECTRICAL HARNESS:
- The connectors in the assembly should be electrically defined and it is placed in the appropriated position on the engine surface.After positioning the connectors place the supporting mounting clips in the engine to acheive the proper routing without fouling of the bundle with the surrounding parts.After achieving ths route the harness in the geometric bundle , make sure the bundle segment do not clash with the surronding parts.Flatten the geometric bundle after finalised the geometric bundle , make sure for the bundle connectivity in the wiring harness.

bundle continuity
- In this step, first we have to make sure that multi-branchable is selected then we have to go in Edit>Search>Advanced>Workbench-Electrical>Type-Bundle Segment>Attribute-Fully Connected
- By selecting 'True' option will show all the connected bundle segments while selecting 'False' option will show all the non-connected bundle segments.
- Here, we have selected for the 'True' option and searched for results. All the bundle segments are highlighted found showing that all the bundle segments are electrically

Flatten view of the engine harness geometrical bundle assembly
- In this step, for creating flatten view we have to work in Electrical Harness Flattening workbench of Catia V5. We should also make sure that the flattening file is saved in the same folder where other files of harness assembly are saved.
- Before creating flatten view, first we have to define flattening parameters. Make sure that selecting 'Single line' for bundle segment and 'Double' line for protective covering.

- We have extracted the bundle assembly into Engine Harness Flattening Product file and then flattened the file along face of interconnection connector as shown in above figure.
- At this stage, for clarity, we have been hidden the flattening diagram of the plastic guiding channels from the drawing view.
- In above figure, we are creating new drawing file and defined all the necessary drawing parameters. We have to insert the front view of the Engine Harness Flattening Product file into the Drawing file.
Conclusion:
- In this way, we have routed wiring harness for the Bugatti V16 Engine. Also, prepared flatten view drawing with proper sheet in CATIA V5
Leave a comment
Thanks for choosing to leave a comment. Please keep in mind that all the comments are moderated as per our comment policy, and your email will not be published for privacy reasons. Please leave a personal & meaningful conversation.
Other comments...
Be the first to add a comment

Related Courses


Skill-Lync offers industry relevant advanced engineering courses for engineering students by partnering with industry experts.


Our Company

4th Floor, BLOCK-B, Velachery - Tambaram Main Rd, Ram Nagar South, Madipakkam, Chennai, Tamil Nadu 600042.

Top Individual Courses
Top PG Programs
Skill-Lync Plus
Trending Blogs
© 2025 Skill-Lync Inc. All Rights Reserved.