


Courses by Software
Courses by Semester
Courses by Domain
Tool-focused Courses
Machine learning
POPULAR COURSES
Success Stories

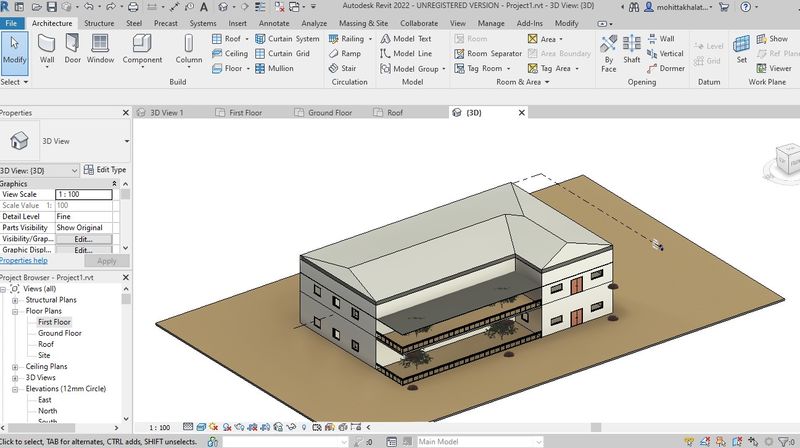
Creating Architectural and Structural model with 3D rendering using REVIT
Q1. Select the type of structure you want to build from one of the three below: a. Multi-Unit Residential Apartment b. Office Buildings c. School Ans. I choose Multi-Unit Residential Apartment Q2. Assume reasonable assumptions…
Mohit Takhalate
updated on 02 Dec 2021


Q1. Select the type of structure you want to build from one of the three below:
a. Multi-Unit Residential Apartment
b. Office Buildings
c. School
Ans. I choose Multi-Unit Residential Apartment
Q2. Assume reasonable assumptions for geographic and location details for your project modeling. Based on assumptions and type of structure selected identify the modeling requirements from NBC?
Ans.
1. As mentioned my building comes under residential category and it can be situated in the center of the city.
2. My project is located near the ring road.
3. The road width in front of my building is 60'.
4. The heigh area and safety measureswill follow the rulesand regulations of NBC.
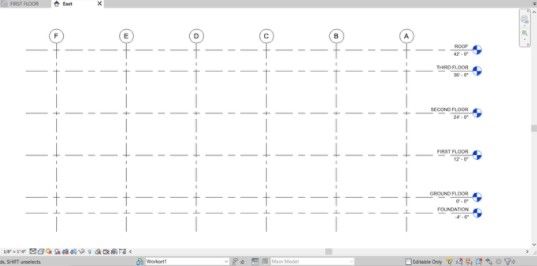
5. The height of my project is 42' and the road width is 60'.
6. So my building height is 12.8 m and the road width is 18.2 m, the height of the building should not exceed 1.5 times the width of the road width.
7. In this case the building height is not exceeding so it is suitable for construction.
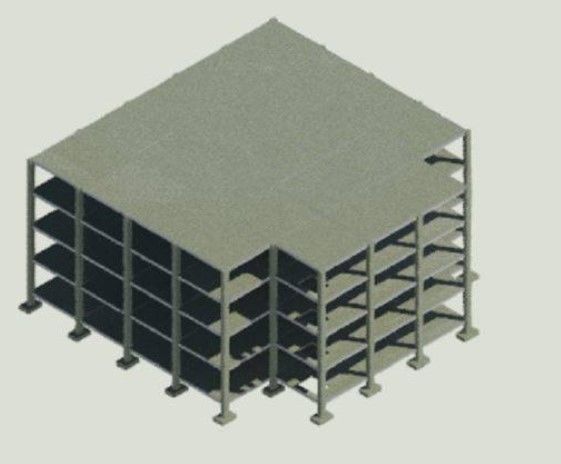
3) Using the structural model, include the following components based on the type of structure selected
a. Foundation – Isolated / Wall/Matt Foundation
b. Columns
c. Beams Connected to Columns
d. Roof Framing/ Truss
e. Floor / Decks
f. Floor Openings for Elevators and Stairs
Ans.
AIM - Using the structural model, include the following components based on the type of structure selected
a. Foundation – Isolated / Wall/Matt Foundation
b. Columns
c. Beams Connected to Columns
d. Roof Framing/ Truss
e. Floor / Decks
f. Floor Openings for Elevators and Stairs
Procedure -
1. First open a architectural tempate in revit.
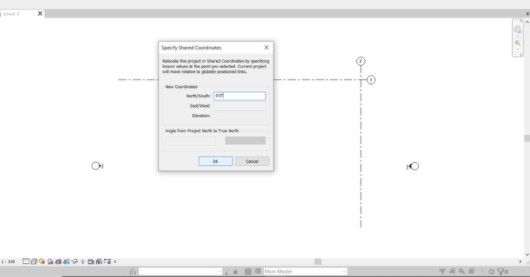
2. Then draw two grid line sand and specift the coordinates as 0'0"for both north-south and east-west.
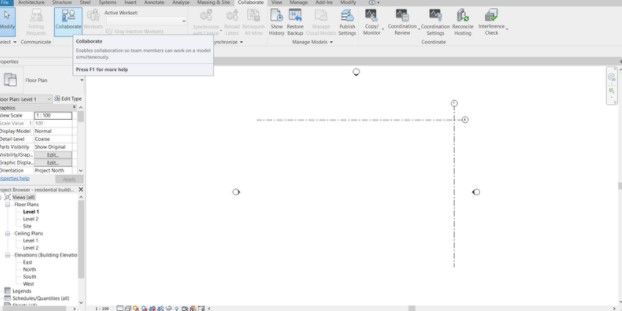
3. click on collaborate and save the project.
4. Next open a new structure template and save it as residential building
5. Repeat step 2 and 3 and save the project.
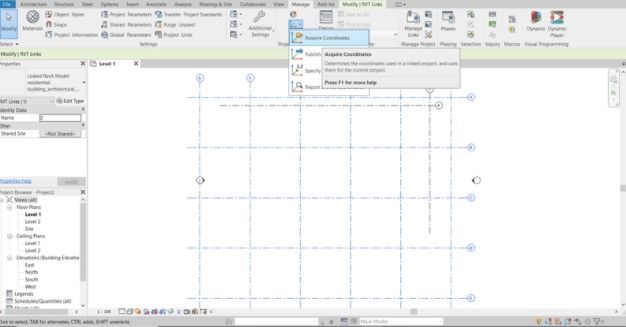
6. Create a new architectural template and add the architectural and structural links using manage links option.
7.Select acquired coordinates and set the links to the current link coordinates.
8. Now start drawing the structural components of the project in structural template.
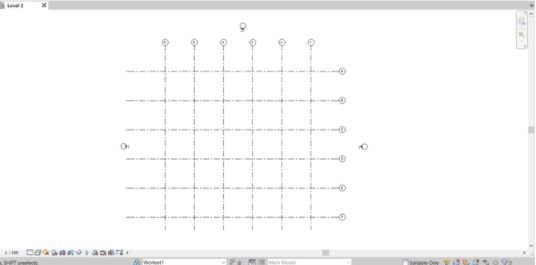
9. Draw horizontal and vertical grid lines.
10. Select column option from the structural tab and draw the columns at intersection points of the grids.

11. In the same way draw the other structural components like foundation, slabs, beams.
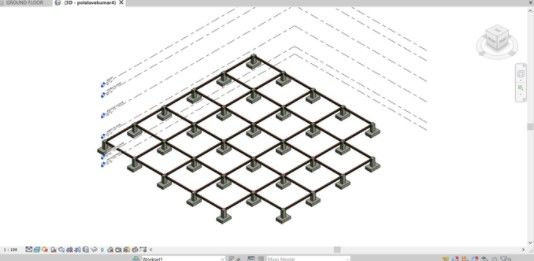
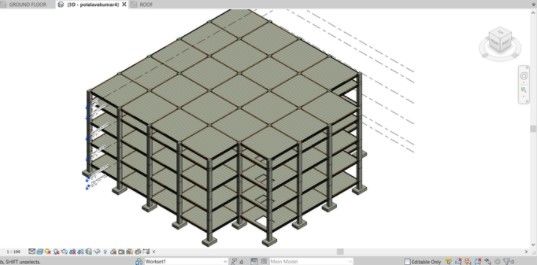
Result - Design of structural components are completed.
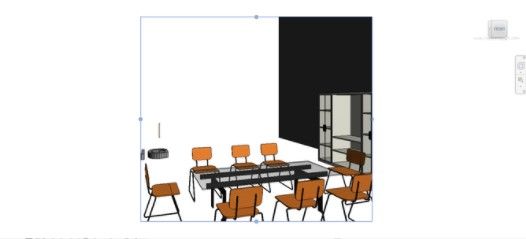
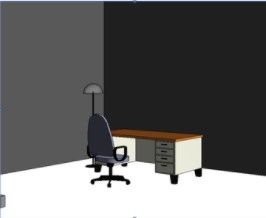
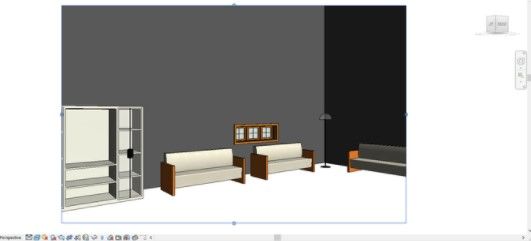
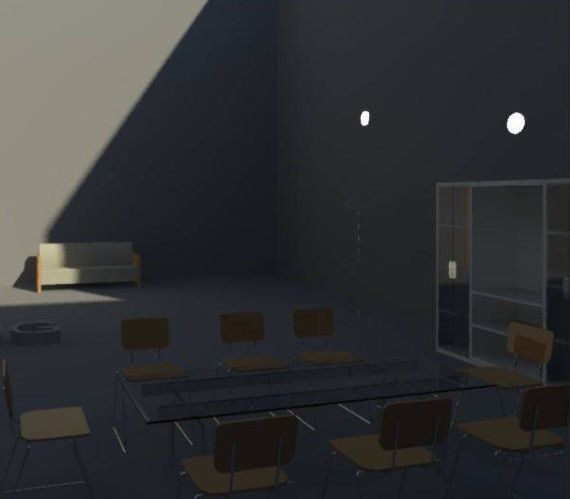
Q4. Using the architectural model, include the following components based on the type of structure selected
a. Wall Layout with appropriate material and finishing
b. Exterior façade with fancy finish
c. Interior partition walls to size rooms
d. Components to add details to a room ( Desk, Chair, Lighting, Plumbing fixtures)
e. Add components such as stairs Elevators
f. Have at-least one side of the building with curtain walls and glass panels
g. Include interior and exterior lighting fixtures
h. Place proper topographic components from outside ( Trees, Parking, Plants) to add details to the model
Ans.
AIM - Using the architectural model, include the following components based on the type of structure
Procedure -
- Now go to the architectural template which was created before.
- Copy the grids which were created in the previous structure template and copy them.
- With the help of paste from clipboard option paste the grids in the architectural template.
- Select the grids and pin them so that they do not get disturbed while doing the project
- Now go to elevation and create thelevels required from architectural tab.
- Go to virtual graph ics settings and select custom in annotation off the grids.
- Now with the help of the grid lines start creating the exterior walls of the project.
- Wih the help of floor tool add floors to all the levels.
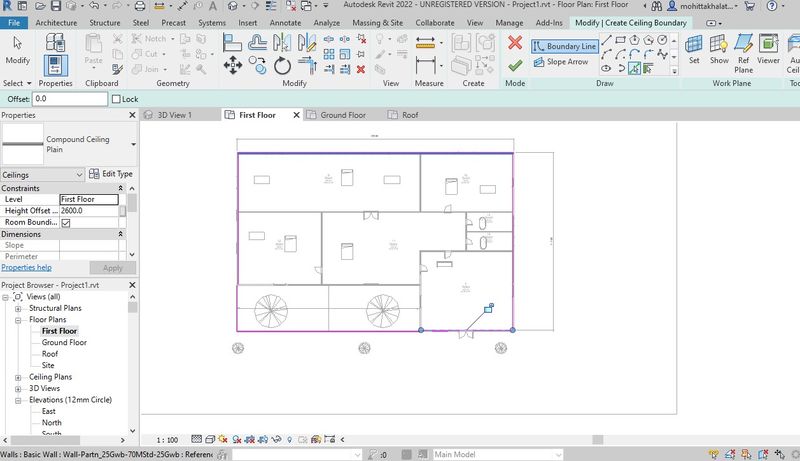
9. With the help of wall tool from the architectural tab add interior partition walls with thickness less than the exterior walls.
10. With the help of load family load the components required for the project and add them in the drawing using components tool and add plantings.
 |
 |
 |
Result - Using the architectural model, include the following components based on the type of structure are completed.
Q5. Provide a set of drawings in an architectural and structural model to list the following details with categories and appropriate sheet templates included
a. Floor Plans with Annotations
b. Elevations
c. Sections
Ans.
AIM - To provide the structural and architectural models and views on the sheet template lie floor plans, elevations and section views.
Procedure -
1. Go to the view tab and select sheet tool.
2. Sheet dialog box appears,A1 metric and click on ok button.
3. We can rename the sheets by double clicking on the name and use appropriate names to the sheets.
4. Go to insert tab and select on load image option.
5. With the help of load image we can add images into our the sheets and save them.
6. Follow the same process and add the structural and architectural models into the sheets.
7.Add floor plans with the same steps into the sheets.

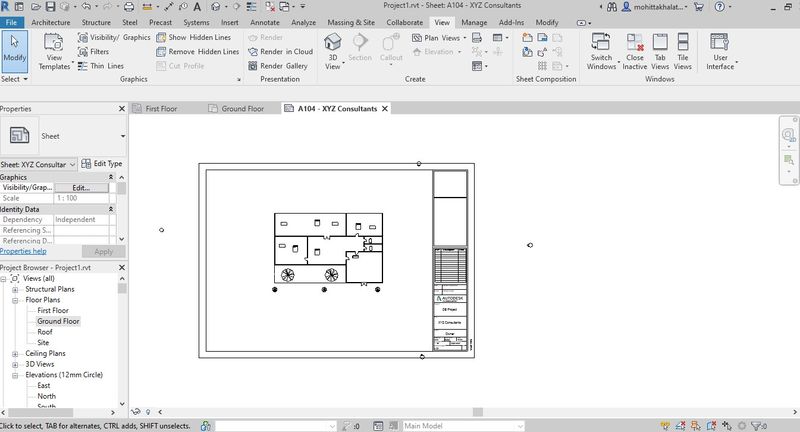
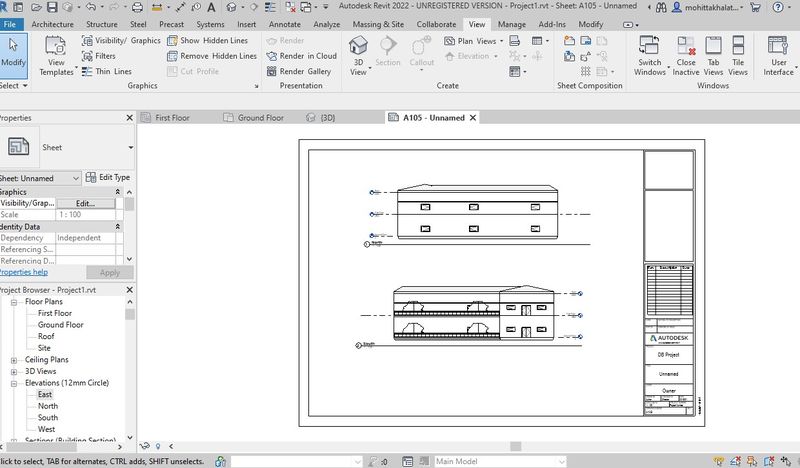
8. Add elevation plans with the same step into the sheets.
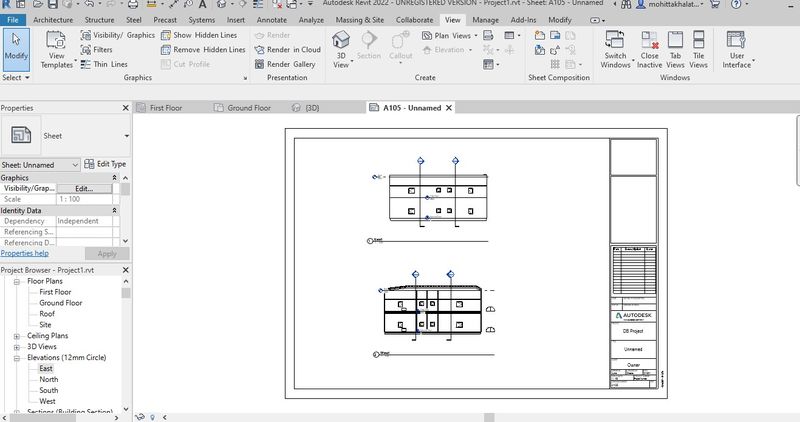
Result - The structural and architectural models and views on the sheet template lie floor plans, elevations and section views are completed.
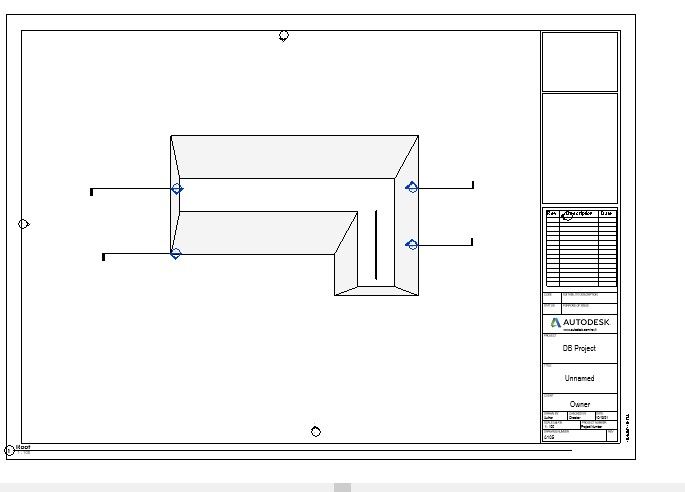
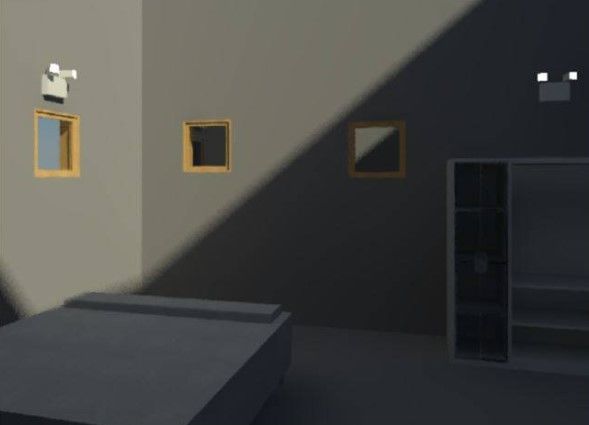
Q6. Using the Rendering settings, Render images of the 3D model produced and include the rendered images to the drawing sheets
a. Rendering from interior rooms
b. Rendering from out showing topographic features
c. Rendering through structural framing
Ans.
AIM - To render the images which were capture by the camera view. for example like the interior rooms, topographic views and structural framing.
Procedure -
- First open the 3D view and open the picturewe want to render.
- Next go to view menu and click on render option.
- Render dialog box appears.
- Select region option and crop the region we want for the image.
- We can change the scheme, styles and lighting optionsand click on render.
- We will get the rendered image which appears more realistic and can be used for better presentation of the project.
 |
 |
 |
 |
Leave a comment
Thanks for choosing to leave a comment. Please keep in mind that all the comments are moderated as per our comment policy, and your email will not be published for privacy reasons. Please leave a personal & meaningful conversation.
Other comments...
Be the first to add a comment
Read more Projects by Mohit Takhalate (36)
Reinforcement detailing of Columns from ETABS output
AIM - Reinforcement detailing of columns in Etabs 2018. The ETABS file for a G+4 building is provided. Run the analysis and design the RCC Moment Resisting Frame. The following challenge deals specifically with two columns at the following grid intersections. 3A 3B Provide details of longitudinal reinforcement for…

01 Apr 2022 07:33 AM IST
Reinforcement Detailing of Beams from ETABS output
Challenge 7 – Detailed design of concrete buildings -1 AIM - Detail design of beams in Etabs 2018.The ETABS file for a G+4 building is provided. Run the analysis and design the RCC Moment Resisting Frame. The following challenge deals specifically with two continuous beams in the 1st floor. …
30 Mar 2022 09:31 AM IST
Project 1_Comparative study of different storey buildings for Seismic forces
24 Mar 2022 02:45 PM IST
Modelling of 25 storey building with the specified properties using ETABS
Challenge 6 – ETABS modelling of a 25 storey building AIM - Model a 25 storey building on ETABS with structural properties as specified below. Ground floor or plinth floor level can be taken at a height of 1.5 metres from the base. Each of the successive 25 storeys has a storey height of 3 metres. Structural…
23 Mar 2022 06:31 AM IST
Related Courses


127 Hours of Content
Skill-Lync offers industry relevant advanced engineering courses for engineering students by partnering with industry experts.


Our Company

4th Floor, BLOCK-B, Velachery - Tambaram Main Rd, Ram Nagar South, Madipakkam, Chennai, Tamil Nadu 600042.

Top Individual Courses
Top PG Programs
Skill-Lync Plus
Trending Blogs
© 2025 Skill-Lync Inc. All Rights Reserved.